homemade granola bars. oil free, refined sugar free / vegan

Granola Bar Addict? Yes I admit that is one of my many titles (along with frozen fruit obsessor).

14541862361_70cb6250a7_o

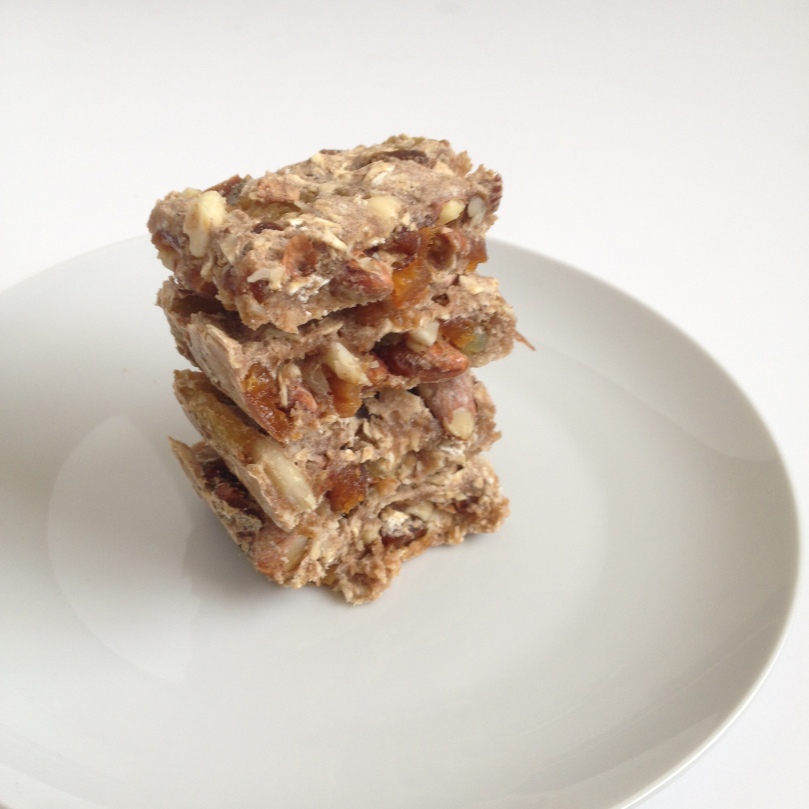
It’s so hard for find granola bars that are good for you in stores without being super overpriced. I’ve heard amazing things about KIND bars, along with other brands, but they’re just more expensive than I would want to pay for a granola bar. And so, this is where this recipe steps in.

14358694398_95178708c3_o

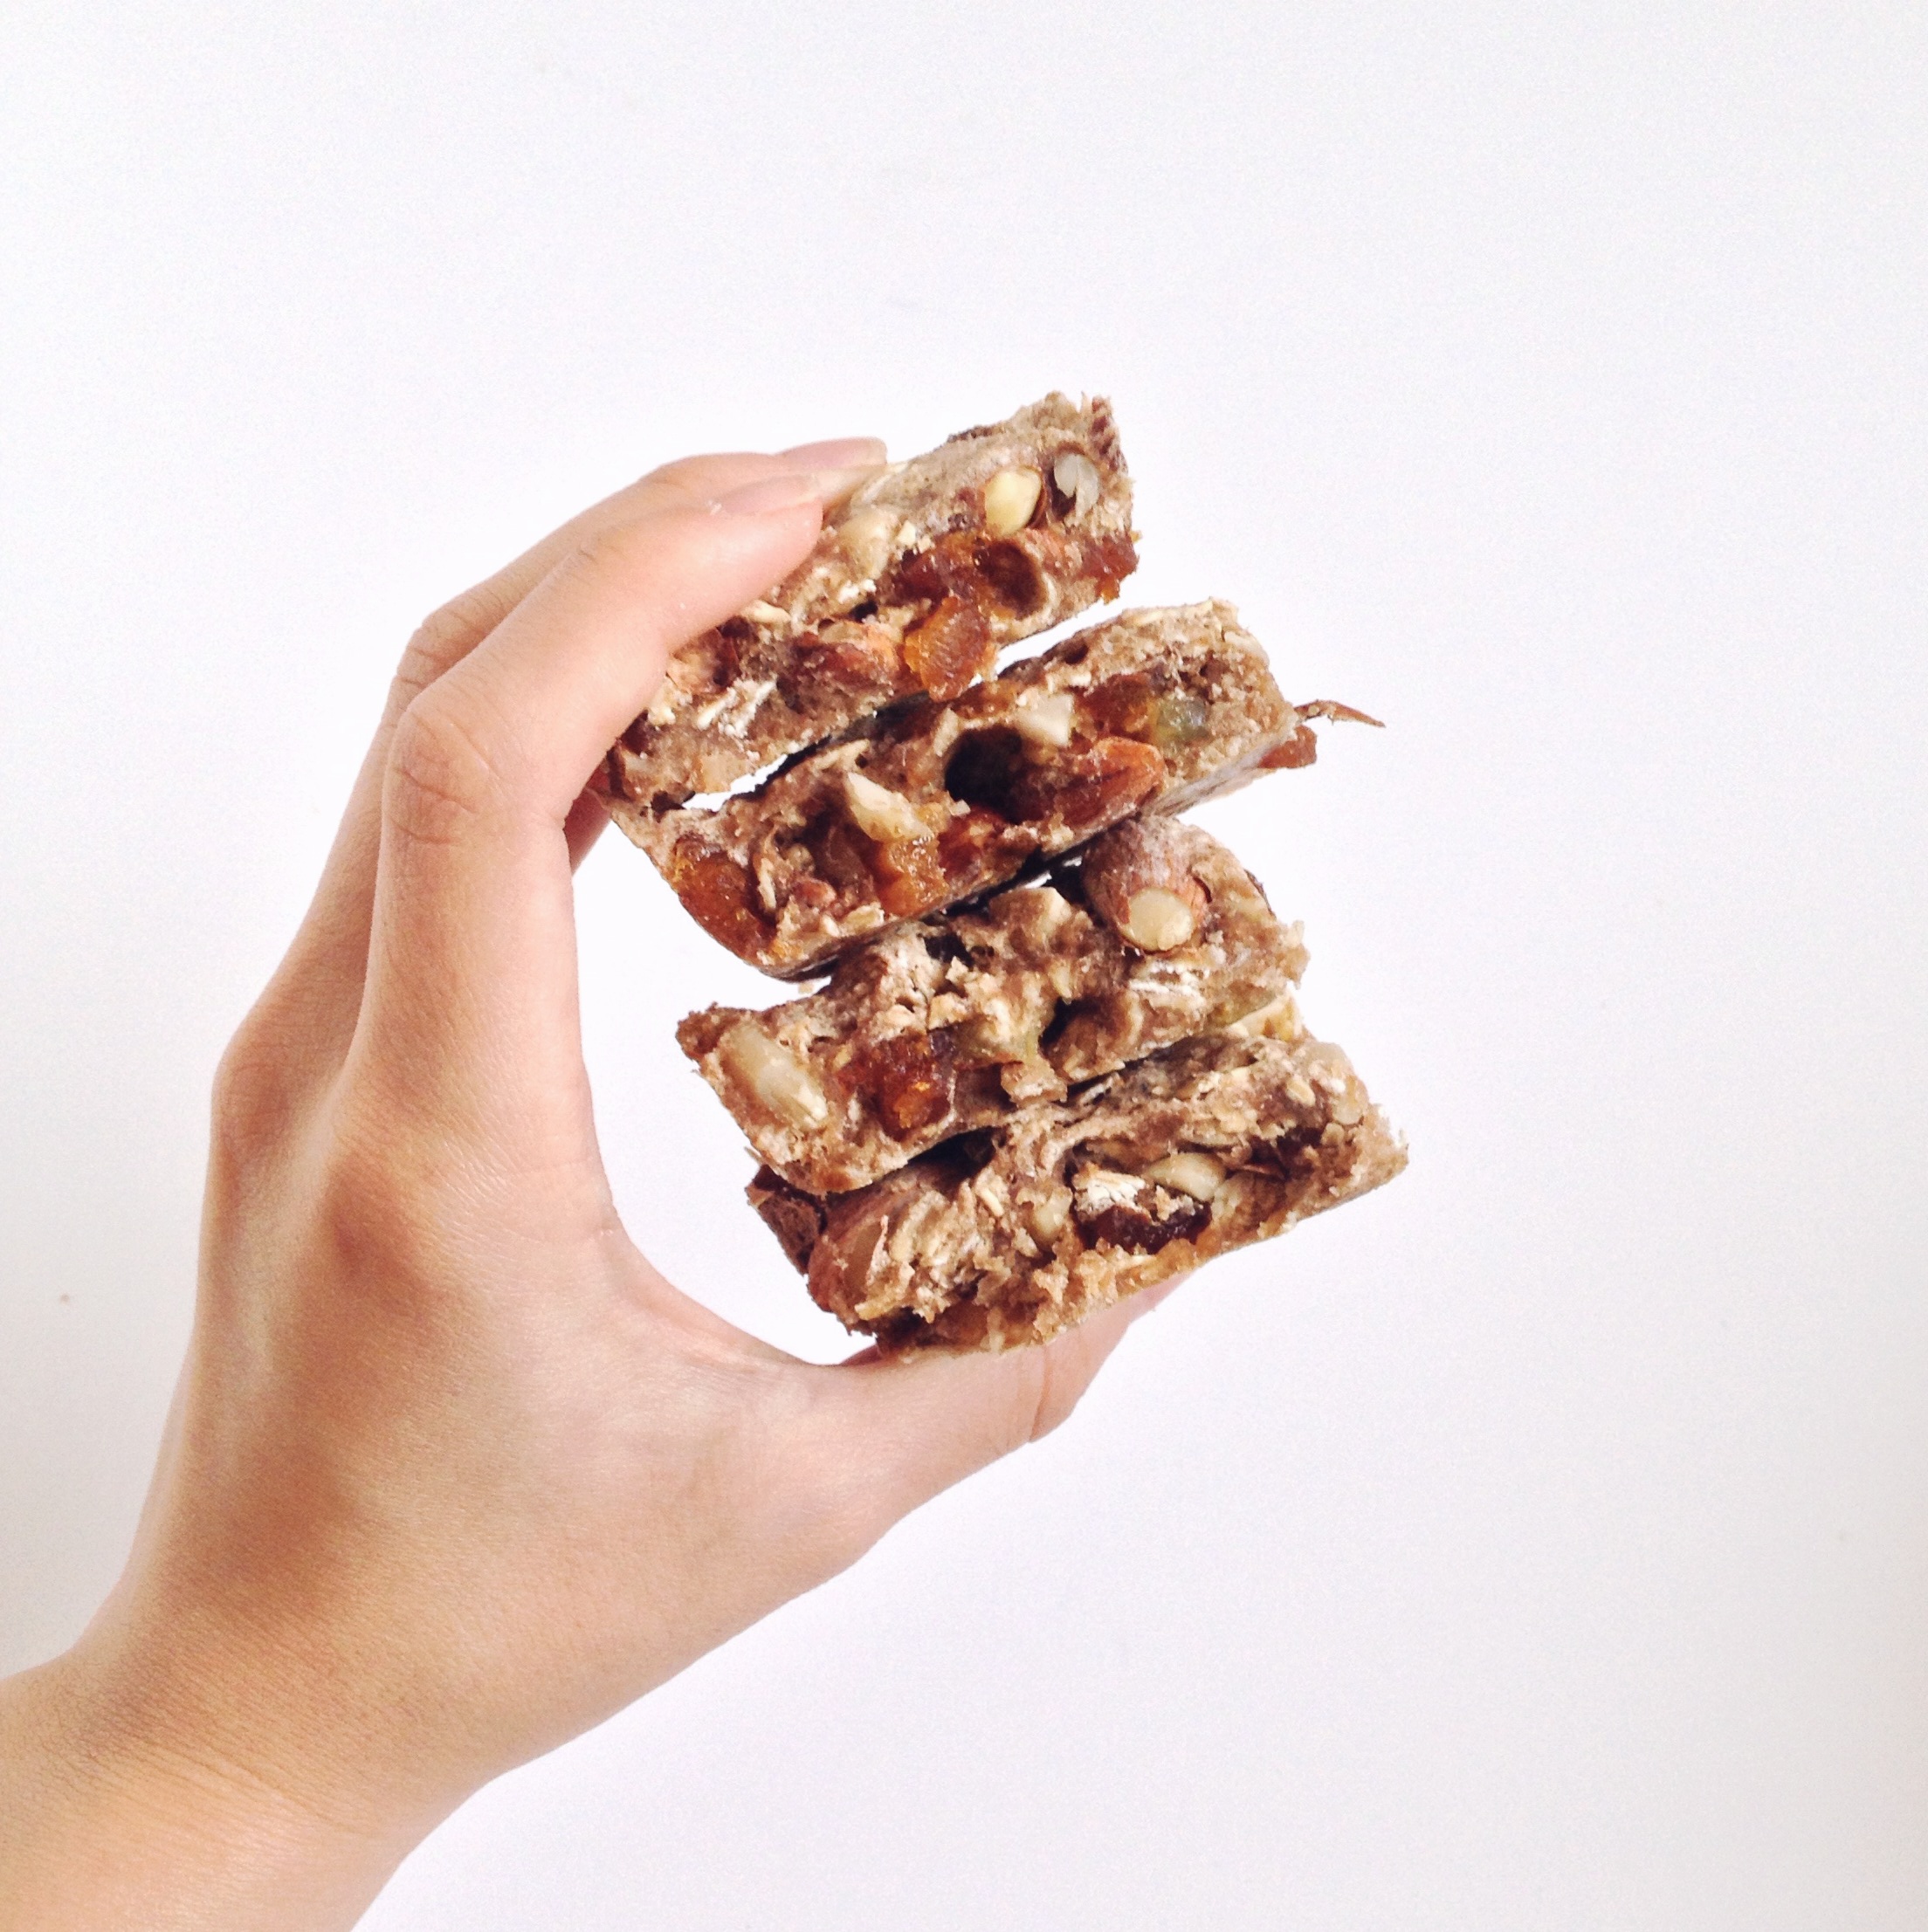
Vegan, oil-free, and sweetened with only the natural taste of nature – these granola bars will satisfy your tastebuds just as they did for mine.

Processed with VSCOcam with a5 preset

you will need:

  • 1/2 cups rolled oats
  • 1/2 cup chopped nuts of your choice (I used almonds)
  • 1/2 cup flour (I used organic sprouted spelt flour)
  • 1/4 cup dried apricots, chopped
  • 1/4 cup raisins, chopped
  • 1/4 cup whatever dried fruit you want tbh (maybe dates)
  • apprx. 1/4 cup water**

the process:

  1. preheat oven to 325 degrees
  2. prepare a baking pan with parchment paper
  3. put flour + oats into a medium sized bowl
  4. chop up your nuts + dried fruit if they aren’t chopped already and add to the bowl
  5. add 1/8 cup of water and mix the mixture with your hand
  6. keep adding water until it’s not too dry and the batter is one big ball
  7. add the batter onto the prepared pan and press firmly down until it’s flat
  8. use a sharp knife to cut the mixture into squares in the pan
  9. bake for around 20-25 minutes
  10. bake all the way through. it’s supposed to be a little soft and not completely hard. this will vary with each person’s ovens so make sure to check your bars at around the 15 minute mark.

**note: the amount of water you need depends on the mixture you have at hand. if you think it’s too dry, add a bit more water. only do a 1 tbsp. increment at a time so you don’t add too much.


love thyself / thoughts

To be quite honest, I should probably be studying right now. But this is something I have to get off my chest and so I’m sitting here in my mother’s cubicle at work typing this.

Body positive. Body image. Self love. Three phrases that are so crucial, so essential, to live a life that is, in my opinion, truly fulfilling and satisfying. But sadly, so many people struggle with this. Not just the average teenage girl as you would expect, but people of all ages, genders, and races.

Human beings are such lovely people and are so incredibly lucky and blessed. We have crafty hands equipped with five nimble fingers on each. We have disposable thumbs to help us complete tasks that would otherwise be unreachable. We have strong, beautiful legs that bring us anywhere we want in this world. We have a stomach that digests the delicious, nutritious food that our body thrives on. We have arms that push us out of our comfortable bed every morning, arms that help during our daily tasks. Humans are extraordinary beings with amazing abilities. So why do we get so hung up on outer appearances? More specifically, why do we get so critical with what we see in the mirror when it doesn’t actually matter at all.

So what if you don’t have that strangely coveted inner thigh gap? So what if your legs aren’t perfectly toned and tanned like those “fitspo” girls you see everywhere on the internet? So what if you don’t have a flat stomach? A perfect set of abs? Nicely toned arms? What do those even mean; what do they even represent? Certainly not your self worth. Most certainly not your gorgeous personality or capabilities as a person. Why do we get so obsessed with how we look and the desire to achieve it?

I ask myself these questions every day. I ask myself that question now as I’m typing this. Why is it that when I look down at my legs I feel dissatisfaction? Why am I so hard on myself about my body? When I’m recovering and my body is changing and healing, why am I panicking about how my clothes pre-recovery are beginning to feel tighter? Looking back on it, I realize it was a bad idea buying small clothes during my worst time because it’s just like asking for a trigger while recovering. Sometimes I’m so lost on what to do, on how to love myself. Sometimes I have days where I feel wonderful and loving towards my body.

Recovery is a process. Recovery is a never-ending journey filled with ups and downs that we just have to push through every day. There will be incredibly hard days. There will be slightly easier days. And hopefully, eventually, the number of easier days will start to multiple and grow. Hopefully, one day the hard days where we’re unnecessarily tough on our bodies will become less and less until they’re a faint spot in the back of our memories – until those days only come out once in a blue moon.

This is already so long so I’m going to end it here. I have so much to say on this topic so I think I’ll split it up into several posts. I know that this is a “recipe” blog, but this is also kind of a personal journey kind of thing, so I hope no one will mind these occasional posts too much.

xx

Annie

all the same / smoothies (v, gf)

13968696630_23b736c47f_o

though all my pictures are of different smoothies, because they all have one key ingredient in common (spinach), they all look identical – hence the title of this post. it’s true I didn’t make many changes and that they were all edited the same way. otherwise, there would be some discrepancies with the shade of green.

13924191037_e066418b6a_o

for this basic green smoothie, i always use banana as a base and then whatever fruit i have on hand. most likely i’ll also blend in some strawberries, and if i want to thicken up the mixture, i’ll pop in a tablespoon or two of greek yogurt as well.

14107598681_2946efd252_ofor a basic green smoothie recipe that’s incredibly build-able, you will need:

  • 1 ripe banana
  • 1 handful of spinach
  • 1/4 a cup of water or non-dairy milk
  • 1/2 cup strawberries**
  • any other fruit you’d like to include

the process:

  • pour in the liquid and put your sliced banana chunks on top; then blend.
  • add your spinach and blend until it’s smooth.
  • add in whatever else fruit you want and blend to your preferred consistency.

as you can see, this recipe isn’t really a “recipe” but more of a list of ingredients to give you an idea of what to put in your green smoothie. I honestly have no set measurements and I just kind of throw ingredients in as I go. the ingredients listed above are what I almost always have in my green smoothies. like i said earlier, sometimes I’ll add greek yogurt to thicken it up (avocado would work too) and maybe some medjool dates to sweeten the smoothie even further. sometimes i’ll toss in some tangerines, oranges, apples, kiwis, etc. if I have them and blend them all together. as long as you taste it while you go, you won’t be surprised at the end result and you’ll probably really like it as well!


seed me no more / smoothie (v, gf)

13901998936_eb503283c4_o

new blender means quicker smoothies. and a shopping trip to costco means huge boxes of strawberries and blackberries. both of these things makes me a very happy girl.

because the blackberries have a lot of seeds, when I blend this smoothie, it actually doesn’t get ground up and instead stays in the mixture. I don’t really mind it as much because it gives it an interesting texture. but if you think you’d mind the little crunch, then you are forewarned.

you will need:

  • 1 ripe banana
  • 1 handful spinach (yes this is a “green” smoothie in disguise)
  • 1/2 cup of strawberries
  • 1/2 cup blackberries
  • a splash of water

the process:

  1. i like to put a bit of water in first to get my blender moving.
  2. then add the banana, chunk by chunk.
  3. blend until smooth.
  4. add the spinach; blend until smooth.
  5. add strawberries and backberries
  6. blend until smooth, or to the consistency you wish.

variations: by using frozen berries or bananas instead of fresh ones, you can thicken up the consistency.

apple chunk banana nut date bread / revisited

IMG_1160

This recipe came to be from an adaption of one of my earlier recipes (vegan apple chunk cinnamon banana bread). I was in the middle of making it when I realized my jar of organic applesauce had grown mold! You cannot imagine my devastation because there was at least a good 1 – 1 1/2 cup of applesauce left in the jar. It was such high quality apple sauce – organic, thrice washed, unsweetened Fuji applesauce. Oh the regrets. I had used it very sparingly in the past because it was not very cheap and it was organic, which is pretty rare to find where I live. But now look what happened! Not only was I not able to finish using it all, but it is also essentially such a waste of good applesauce. Take note and learn from my mistakes – when it comes to food, don’t “save” it because you’re going to end up eating it anyways. Might as well enjoy it as often as you can and get your money’s worth out of it.

IMG_1159

But please do excuse my rambling, I shall try to finish my story as quickly as possible. As I ran out of applesauce, I had only one other binding agent left in my pantry – greek yogurt. Now, on hindsight, I realized I probably could have used a chia egg or perhaps added more bananas, but this version turned out quite yummy so that’s all good. I also used organic spelt flour this time instead of oat flour (because I ran out) which turns this recipe both non-vegan and non-gluten free. So I’m dearly sorry for all my readers who are looking for those two options.

IMG_1158


Though if you really want to have a gluten-free, vegan banana bread, you can just refer to my original banana bread recipe (here) and just add in the extra ingredients (namely – the dates). It will taste around the same and both are super delicious! Alright, now getting into the actual recipe.

apple chunk banana nut date bread / serves: 4-5 

you will need:

  • 2 very ripe bananas
  • 1 1/4 cup spelt flour
  • 1 peeled and diced apple
  • 1/2 cup greek yogurt
  • 1 tbsp + 1 tsp. unsweetened almond milk*
  • 4-5 dates
  • 1 tsp. salt
  • 1 tsp. baking soda
  • 1 tsp. cinnamon
  • a handful of chopped nuts and any other toppings of your choice
  • sprinkle of oats (optional)

the process:

  • preheat your oven to 350 degrees and either grease a loaf pan or line it with parchment paper
  • soak your dates in a bowl of water if they aren’t very soft
  • mash your bananas in a bowl
  • add in your greek yogurt and combine well
  • add in the flour, bit by bit, and mix until just combined
  • add 1 tbsp. + 1 tsp. almond milk if needed to thin the mixture
  • add your salt, baking soda, and cinnamon and mix in
  • chop up your apples, dates (de-pitted), and nuts
  • fold in your diced apples, dates, and nuts
  • pour into your loaf pan and sprinkle top with oats and/or more nuts & dates (if you wish)
  • bake for 40-50 minutes, remember to check periodically after the 30 min. mark as every oven is different with the toothpick test
  • enjoy!

note: this oil-free, refined sugar-free banana bread is one of those breads that taste the best right out of the oven. when it’s warm and gooey from the dates, topped with some (frozen) banana slices and almond butter – it’s like heaven in your mouth. i would not advice letting this particular bread sit out past 2 days as it does taste the best in the first couple of days.

*the almond milk is because greek yogurt may not add enough moisture into your banana bread / mixture; that is the amount that I used, however you may add more or less depending on the consistency you achieve. if you use normal yogurt or coyo, for vegans, which is more liquid-y, then you may or may not have to add the almond milk. again, try and add it based on the batter consistency. you may use any other non-dairy milk or even just water.

banana “nice” cream / recipe (v, gf)

IMG_1071

if you are a frequent visiter to instagram (and perhaps tumblr as well), then you are probably well aware of the phenomenon known as nana ice cream. it’s refined-sugar-free, raw, vegan, and super simple to make! i recommend having either a high-speed blender or a food processor (neither of which i have) to make this as it will make things easier on you and speed things up. if you don’t have either, it’s okay as this recipe is still doable – it will just take some patience and time.

many people choose to use extremely overripe, spotty bananas to make this “ice cream” because that’s when it’s at it’s sweetest. however, if you don’t like the banana taste as much, I recommend using just spotted bananas (so not extremely brown and overripe).

banana “nice” cream / serves 1

you will need:

  • 2-3 ripe bananas
  • 1/4 cup non-dairy milk or water
  • medjool dates (opt.)
  • toppings of your choice (ex. fruit, granola, etc.)

the process:

  • slice up your ripe bananas into coins and freeze them for at least 24 hours beforehand.
  • place a bowl in the fridge to chill while you’re making the nice cream
  • pour in your 1/4 of liquid into your food processor or blender
  • soak your dates in water if they’re hard
  • put in your coins, a couple at a time, into your device and pulse on high
  • continue to blend/process until the mixture becomes creamy and smooth with a soft-serve texture
  • it may take a couple of tries and you may have to take a spoon to push the mixture around to get things moving
  • de-pit your dates and cut them up into small pieces
  • place them into the mixture and mix as well (I recommend doing this towards the beginning of this procedure)
  • add in any thing else that you would like as flavoring: cacao powder, different frozen or fresh fruit, etc.*
  • pour mixture into a chilled bowl and place in the freezer for another 20 minute or so for it to firm up**
  • top with whatever you want and enjoy!

*more flavoring ideas: cinnamon, vanilla extract, nut butters, mint extract or mint leaves. you can even add spinach to make it a green ice cream!

**note: you can leave it in there for a shorter or longer duration of time, depending on the consistency of your nice cream. however, don’t leave it in for too long because ice crystals will form on the top as there are no additives to keep it that from occurring.


detox water / food appreciation

Processed with VSCOcam with a5 presetlemon infused water. this has so many healthy benefits – among which include:

  • increased metabolism
  • helps body rehydrate after a workout
  • cleanses the liver
  • stimulates immune system

(source)

there are also lots of variation of detox water. you can put strawberries and mint, apples, etc. into a bottle of water, stick it in the fridge overnight , and drink the next morning! it’s always good to have some water right when you wake up, and if you’re one of those people who dislike the taste of just normal water, maybe incorporating fruit is a good way to go.


striped berry overnight oats (gf)

IMG_1092


the story behind this: i made a smoothie. i made a batch of overnight oats. i wanted to have both. so I did – at the same time.

IMG_1094


I added some of my smoothie on top of my overnight oats, sprinkled some superfood granola on it, and was pleasantly satisfied with the taste. crunchy because of the granola, sweet because of the smoothie, and savory because of the peanut butter. all of my favorite things in one bowl.

IMG_1093


 striped berry overnight oats / serves 1

what you will need:

  • 1/2 cup greek yogurt (or other non-dairy yogurt for vegan option)
  • 1/2 cup almond milk (or any non-dairy milk)
  • 1/2 cup rolled oats
  • 1 tbsp. peanut butter (opt. or sub any other nut butter)
  • 1/4 cup watermelon
  • 1 frozen banana
  • 1/2 cup strawberries
  • 1/2 cup blackberries
  • 4 medjool dates
  • granola of your choice

the process (condensed version):

the process (longer version):

  • add the greek yogurt, almond milk, peanut butter (opt.), and rolled oats into a jar. stir and leave covered in the fridge overnight.
  • soak (pitted) medjool dates if they aren’t soft
  • add 1/4 cup of watermelon into the blender and blend until smooth.
  • add one frozen banana, one chunk at a time, and blend on high speed.
  • add in your berries + chopped dates and continue to blend
  • you can leave smoothie in the fridge up to two days.
  • the next morning, pour your smoothie onto your oat mixture & top with granola.
  • mix together and enjoy the savory, sweet taste.

berrylicious watermelon smoothie (v, gf)

IMG_1075


what does a girl do when she has a huge bowl of freshly cut watermelon and a bunch of berries? make a smoothie of course!

IMG_1085


i almost always make my smoothies with almond milk or just plain water, but since I had so much watermelon in my fridge (summer fruit time – yes.) I decided to add that to my blender for the water content. and what a good idea that was! because I didn’t strain my watermelon “juice,” it was still pretty chunky and thick so my smoothie wasn’t really thinned out. i added approximately 1/4 cup of watermelon juice. and i’m using approximately very seriously here. In reality, I probably blended around 2-3 cups worth of watermelon, but I poured out most of it into the cup you see above, and left around 1/4 cup of substance in my blender.

IMG_1081


then i just added my normal ingredients (bananas, berries, etc.) and pressed blend! honestly, with smoothies, i find it best to just throw stuff in and go. you never know what kind of flavor combinations you might chance upon. i just kind of take what i have and just toss it in. the more variety, the better in my opinion! this is a pretty sweet smoothie, and it had a very pleasant consistency as well. i also used it as a topping on / used it to make my overnight oats and it complimented the taste perfectly.

berrylicious watermelon smoothie / serves 1

you will need:

  • 1/2 cup watermelon
  • 1 frozen banana
  • 1/2 cup strawberries
  • 1/2 cup blackberries
  • 4 medjool dates (or less, depending on level of sweetness you prefer)

the process:

  • cut your watermelon into chunks and soak your medjool dates in water if they’re hard
  • blend the watermelon first until smooth (you may strain the mixture to get “true” watermelon juice, or just leave it all in there like i did).
  • add in your frozen banana slices and blend
  • cut up / tear your softened dates into small pieces, add, and blend.
  • add your berries, a little at a time, and blend.
  • keep blending until it gets to the consistency you like.

IMG_1088


I used this as a “topping” on my overnight oats, the actual base of my overnight oats, as well as just enjoying it on it’s own. you can even add some spinach or other greens to make this a lovely green smoothie! I just thought the pink color was too pretty to ruin with the green heh. I hope you enjoy this smoothie!


avocado + hummus on toast (vegan)

Processed with VSCOcam with t1 preset

I know I say this a lot, but this is seriously one of my most favorite combinations ever. whenever I have avocados and bread in my house, I just have to make this combo because it’s too good not to. i normally eat it as a spread on toast (like an open-faced sandwich), but recently, I’ve been arranging it like an actual sandwich and I have to say, it’s pretty darn good this way too.

13956022260_5d8a240958_o

fun fact: many people call this “smashed” avo on toast because of the lines the fork makes when you mash the avocado onto your piece of bread. i actually didn’t mean to put avocado and hummus together, but one day I had an abundance of both that I needed to get rid of eat quickly, so I just decided to slap this combination together as a quick breakfast. little did I know that i would fall in love with this savory combo.

13968531238_c3da33ba4e_o


like i said, you can eat this in sandwich form, or just as a “spread” on a piece of toast type of breakfast. either is super yummy!

avocado and hummus sandwich / serves 1

you will need:

  • 1/2 a ripe avocado
  • 2 tbsp hummus (homemade or store-bought)
  • 2 pieces of whole grain bread
  • salt or pepper, to taste (opt.)

the process:

  1. pop your bread into a toaster
  2. slice your avocado in half (we’ll only be using half for this)
  3. take a fork and start mashing up the avocado inside it’s “shell”
  4. spread a tbsp. of hummus on one of your pieces of toast
  5. spread half your mashed avocado onto the same piece of toast, on top of the hummus
  6. repeat with the other piece of toast
  7. either eat separately, or layer on top of each other for a sandwich.
  8. you may also add salt and pepper or lemon juice to give things more flavor if you wish.